Selenium Performance Testing with JMeter and Selenium Grid
Selenium Performance Testing with JMeter and Selenium Grid

1- Install Java 7 or later If necessary
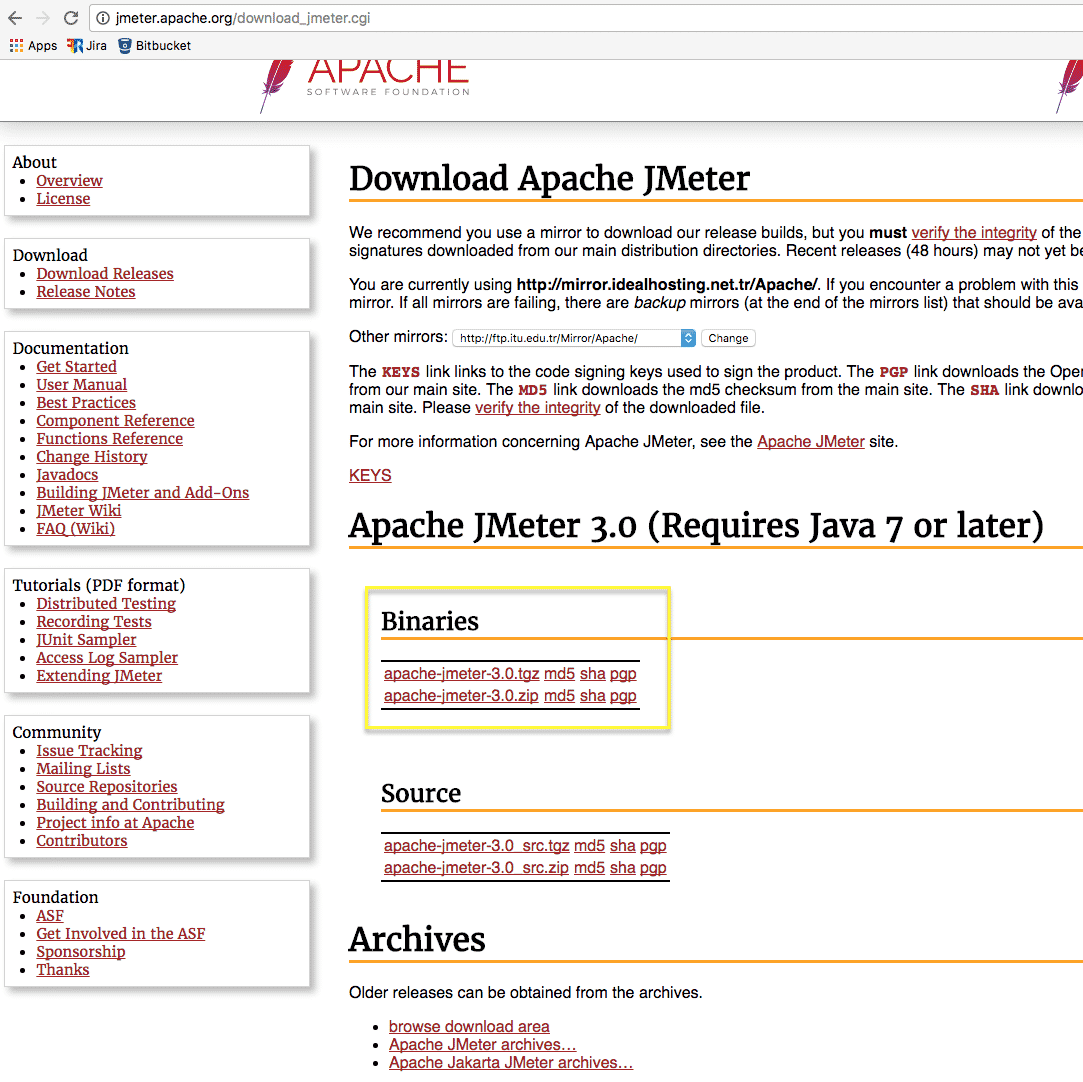
2- Download latest Jmeter version 3.0 or higher.
http://jmeter.apache.org/download_jmeter.cgi
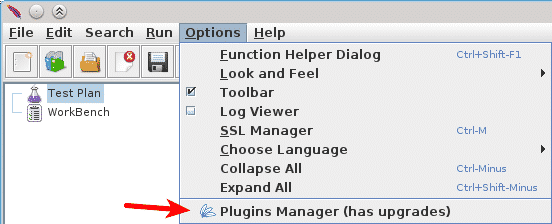
3- Download Jmeter PluginsManager JAR file and put it to Jmeter’s lib/ext directory. Then, start JMeter and go to “Options” menu to access the Plugins Manager. Open Jmeter Plugins Manager and Install “Selenium/Webdriver Support” plugin. Restart Jmeter to take changes for Selenium.
https://jmeter-plugins.org/wiki/PluginsManager/
Now you can use the following libraries with numerous script languages !!
Libraries are: [fusion_builder_container hundred_percent=”yes” overflow=”visible”][fusion_builder_row][fusion_builder_column type=”1_1″ background_position=”left top” background_color=”” border_size=”” border_color=”” border_style=”solid” spacing=”yes” background_image=”” background_repeat=”no-repeat” padding=”” margin_top=”0px” margin_bottom=”0px” class=”” id=”” animation_type=”” animation_speed=”0.3″ animation_direction=”left” hide_on_mobile=”no” center_content=”no” min_height=”none”][selenium-firefox-driver, selenium-ie-driver, selenium-chrome-driver, selenium-api, jsyntaxpane, cglib-nodep, phantomjsdriver, commons-exec, selenium-remote-driver, selenium-htmlunit-driver, htmlunit-core-js, sac, selenium-support, cssparser, htmlunit, gson, nekohtml, guava]
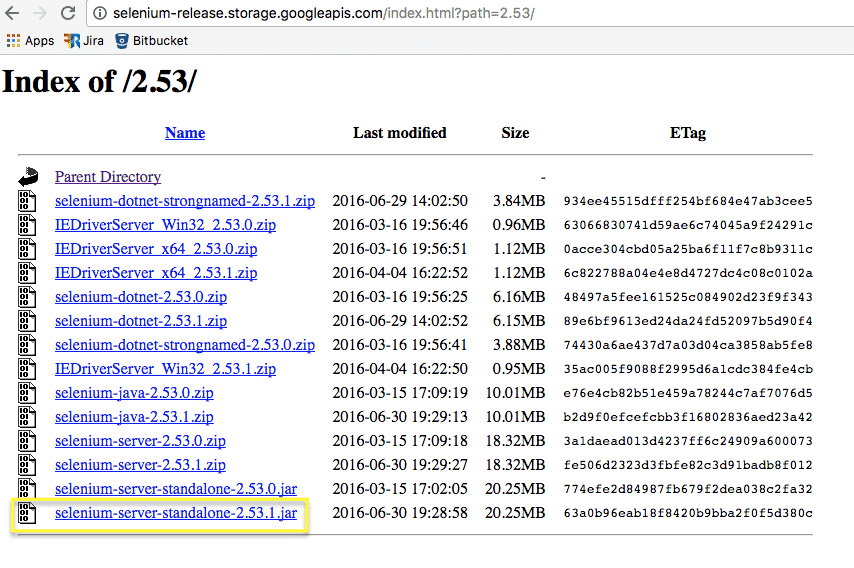
4- Download latest stable version of Selenium Grid (selenium-server-standalone.jar)
http://selenium-release.storage.googleapis.com/index.html
NOTE: If you are using Selenium Grid with your own PC, browser windows will be popout at your PC and will be harder. You should test it on your own PC but you will need an test automation machine. I recommend that, you should use a headless Linux ubuntu server for Selenium Grid execution. The following command must be working successfully.
5- Download your browser driver. We will use Chrome driver in this example.
http://www.seleniumhq.org/download/

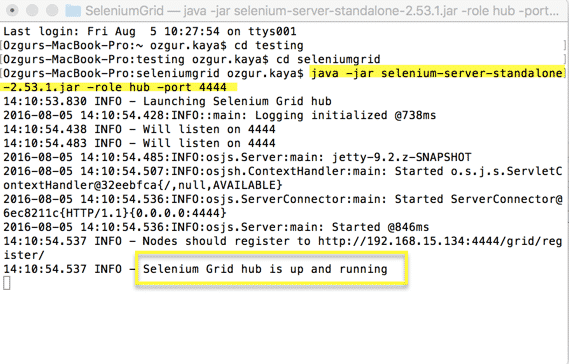
6- Run Selenium Grid Hub
Open the terminal windows or command prompt. Go to the JAR file location and Execute the following command in the first window. This will start the selenium hub.
java -jar selenium-server-standalone-2.53.1.jar -role hub -port 4444
7- Register node to Selenium Grid Hub
Go to the JAR file location and Execute the following command in the second new terminal window. This will start and configure the nodes which you will use it for performance testing. If you need to do a performance testing with 100 concurrent users, you must set maxInstances value to 100. The following code only registers the chrome browsers. You should configure it with mixed browser settings as well.
java -jar selenium-server-standalone-2.53.1.jar -role node -hub http://localhost:4444/grid/register -maxSession 100 -browser browserName=”chrome”,version=ANY,platform=WINDOWS,maxInstances=50 -Dwebdriver.chrome.driver=path/to/the/chromedriver/chromedriver_ForMac


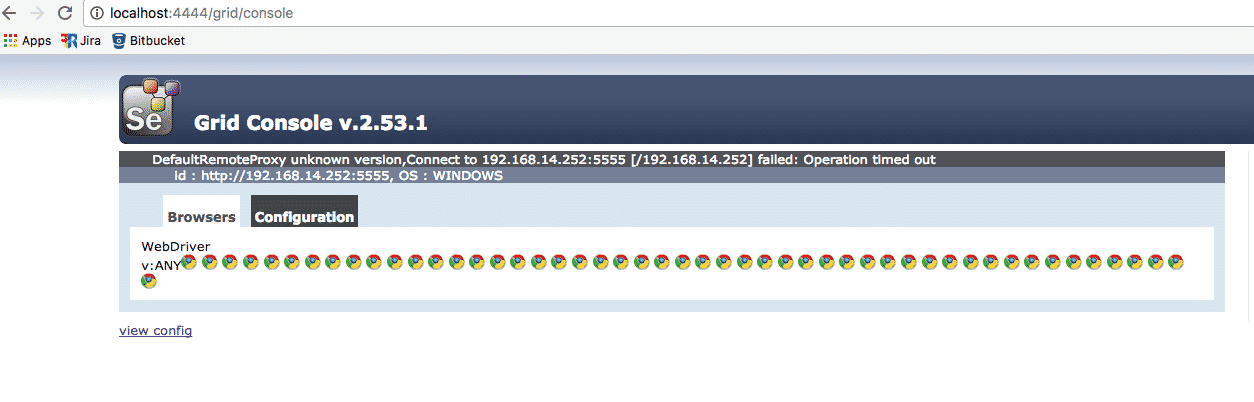
8- Check your Selenium Grid is up and running correctly
9- Run Jmeter from bin/jmeter directory. Add the following elements to your project.
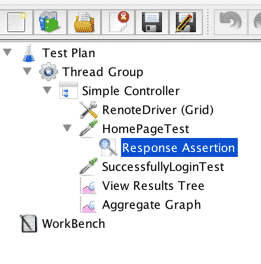
- Right click to Test Plan and Add Threads (Users->Thread Group)
- Right click to Thread Group and Add Config Element -> Simple Controller
- Right click to Simple Controller and Add Logic Controller -> jp@gc-Remote Driver Config
- Right click to Simple Controller and Sampler -> jp@gc WebDriver Sample
- Right click to Simple Controller and Sampler -> jp@gc WebDriver Sample
- Right click to Simple Controller and Listeners -> View Results Tree
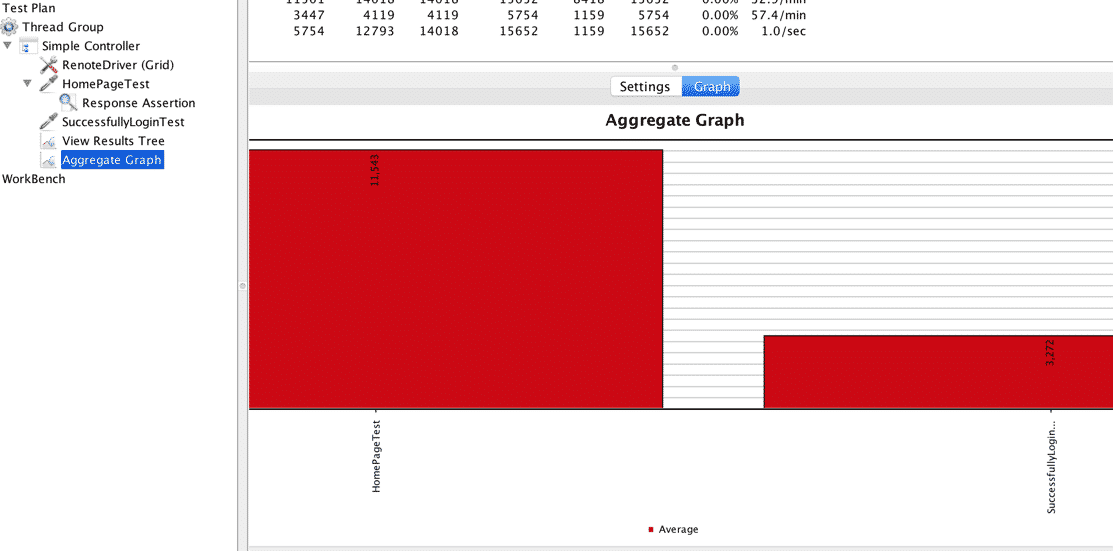
- Right click to Simple Controller and Listeners -> Aggregate Graph
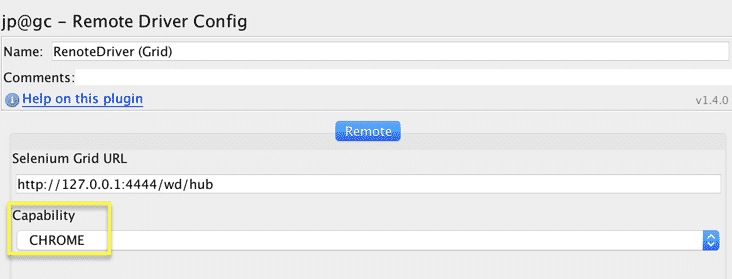
10- Click Remote Driver Config and write your selenium grid URL. You should change 127.0.0.1 to your real existing selenium grid server IP/url. Change capability to Chrome. If you want to use different browser, you must reRegister node to Grid Hub with different settings.
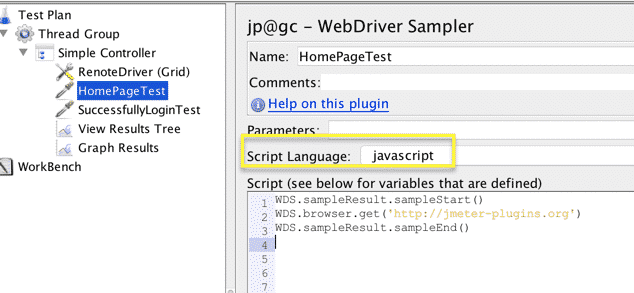
11- Click WebDriver Sample on the left menu. You should write your test scenarios with a lot of scripting languages to here. You should rename your webdriver samples for understandable test scenarios.
There are some useful examples @this link:
https://jmeter-plugins.org/wiki/WebDriverSampler/
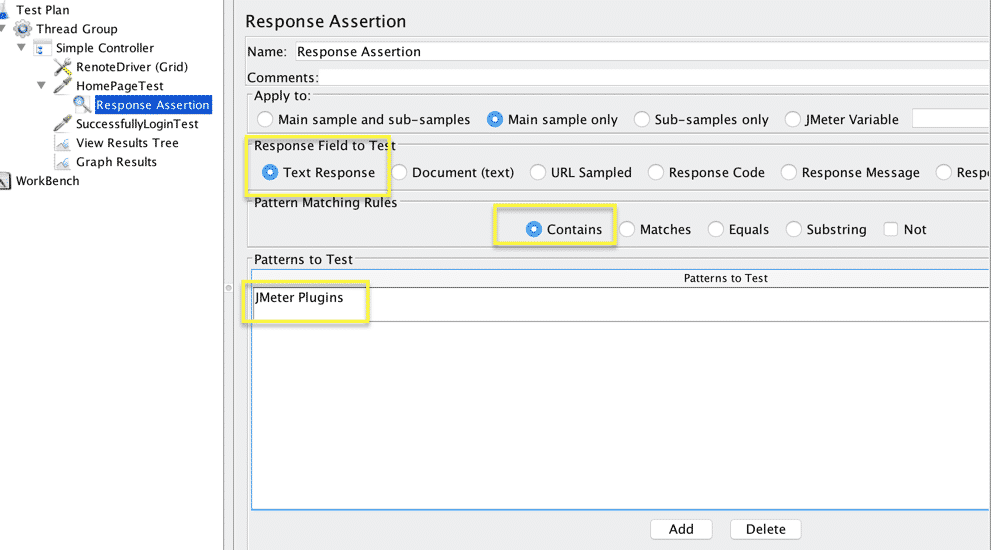
12- Write test asserts
Right click to any Webdriver Sampler and Add Assertions→ Response Assertion.
Right click to any Webdriver Sampler and Add Assertions→ Duration Assertion.
Right click to any Webdriver Sampler and Add Assertions→ Size Assertion…..
Note: Any response codes except 2xx or 3xx will fail automatically. For example 500 Server Error response code will be automatically fail by Jmeter.
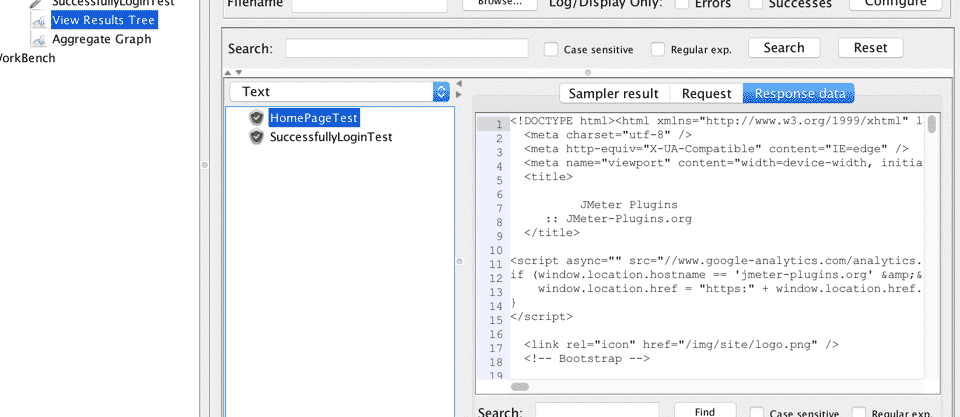
13- View request and response details.(View Results Tree)
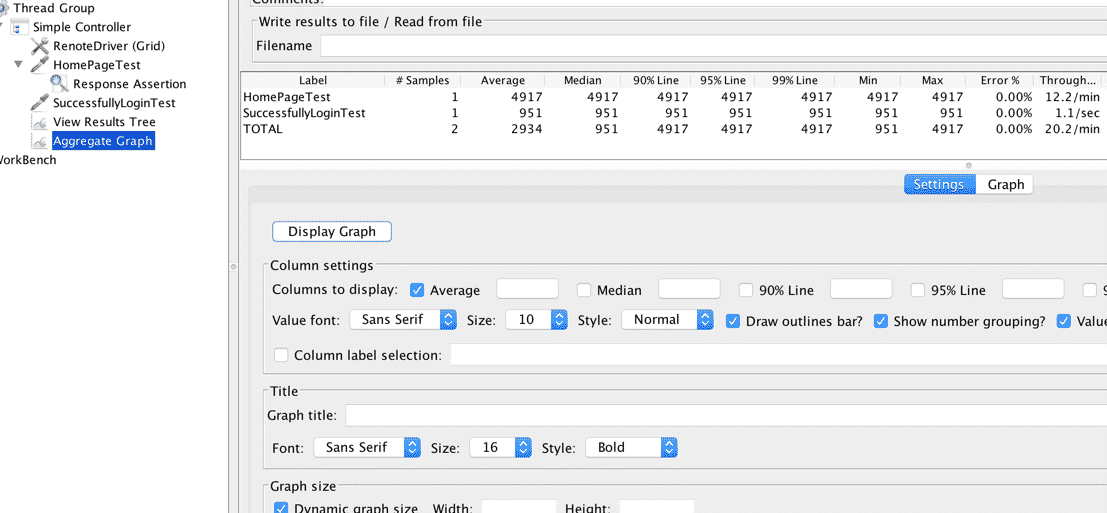
14- View Overall test results listed or graphical. (Aggregate Graph)
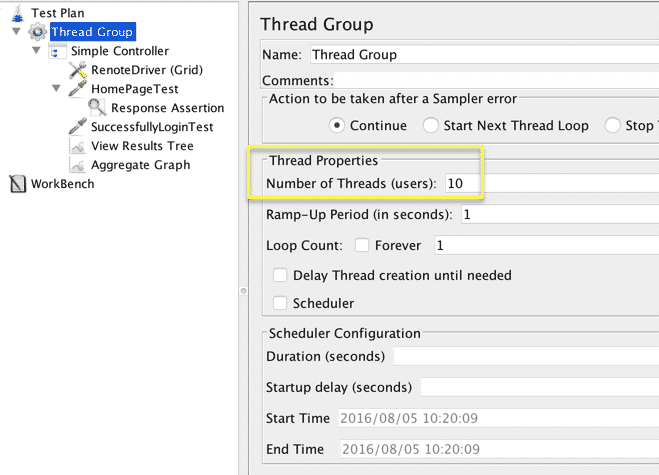
15- Run a Load Test with concurrent 10 users(10 Thread). And You should increase this value step by step. Set Loop count for longer testing.
That’s it ! :)
Note: Don’t forget that you must disable or Configure for “Log/Display only Errors” View Results Tree if you don’t use it. If you don’t do that while running load tests with multiple users, You should get not enough memory or memory leaks problems.


Comments
Post a Comment